
Redis Cache is like bringing your server's memory to the cloud and you can bring more information out from your database and keep it there as long as you want. No pressure given from the garbage collector to release those memory in case of memory shortage problem. In addition, the more information you bring from the database means that less requests from the database as well. Overall, Redis Cache gives you better performance in web server and database server at the same time. Please note that since Redis is a remote type of data structure, it is indeed slower than storing the data in local memory. So you still need to keep login details and site data that is going to be accessed in every page in the local memory.
In this article, I will demonstrate how to use Redis Cache service provided by Microsoft Azure. First part is about how to setup the Redis Cache from Azure. In the second part, I'll be showing you on how to setup and access the cache by using Visual Studio with C#. We will see how to determine whether or not you need to upgrade the Redis Cache in the last part.
In this article, I will demonstrate how to use Redis Cache service provided by Microsoft Azure. First part is about how to setup the Redis Cache from Azure. In the second part, I'll be showing you on how to setup and access the cache by using Visual Studio with C#. We will see how to determine whether or not you need to upgrade the Redis Cache in the last part.
How to setup the Redis Cache from Azure?
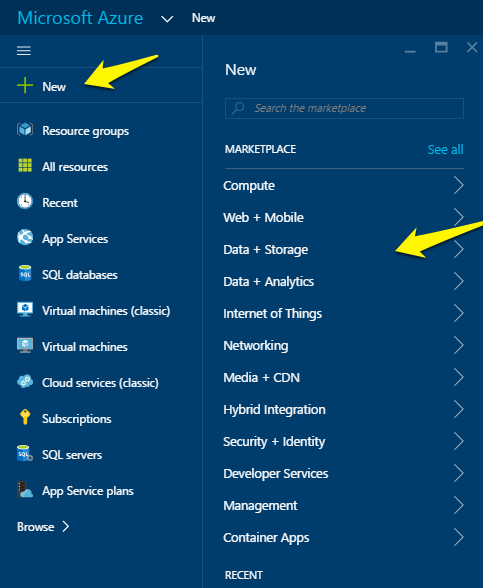
Go to http://portal.azure.com and sign in to the Azure portal. Select the "+" sign on the top left.
Then select "Data + Storage", a list of data storage related services will be shown on the right.
Then select "Data + Storage", a list of data storage related services will be shown on the right.
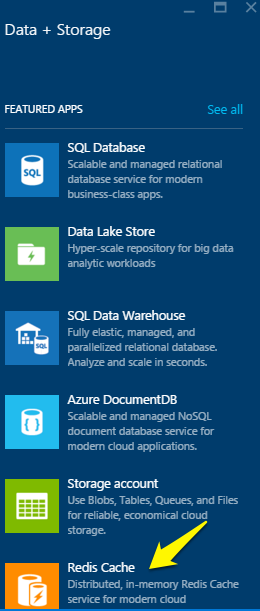
Select "Redis Cache" from the list.
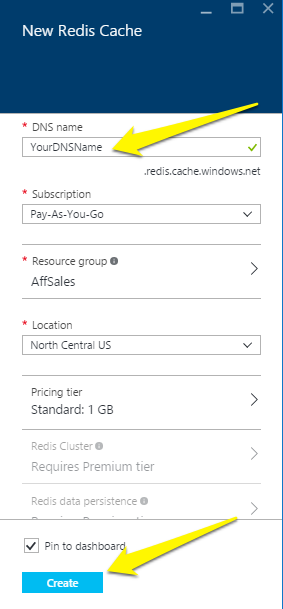
A entry form comes out for you to enter your DNS name in the url: yourDNSname.redis.cache.windows.net. Make sure the Location is selected to the same location where your web application located.
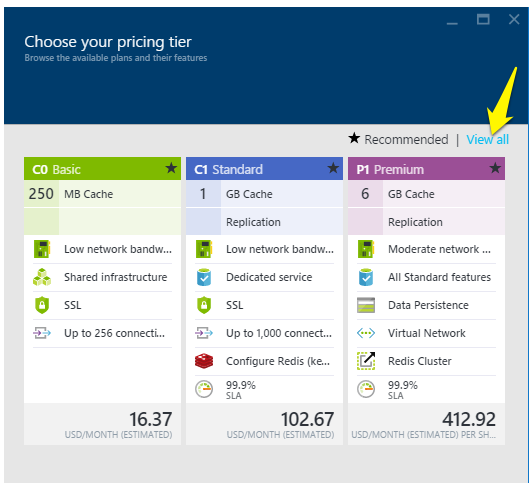
For the pricing tier list options, the minimum is C0 Basic Plan with 250 MB cache and up to 256 connections. You can select this to do the test. Or you can click on "View All" link to see all available plans. Finally, click on the "Create" button.
For the pricing tier list options, the minimum is C0 Basic Plan with 250 MB cache and up to 256 connections. You can select this to do the test. Or you can click on "View All" link to see all available plans. Finally, click on the "Create" button.
|
|
Please wait a few minutes to have Azure create the Redis Cache for you. You will see something like this when it's done.
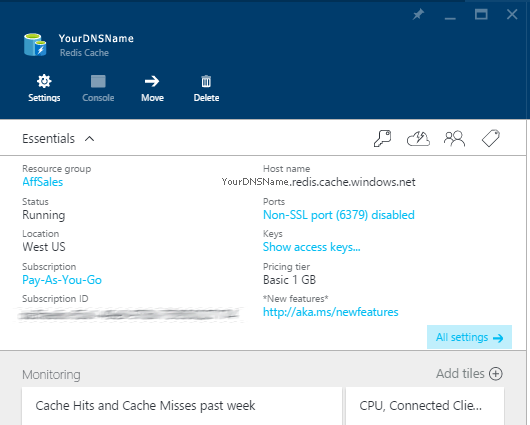
You can find your access keys in the above screen. You need these keys to access your Redis Cache via your application. I will now show you how to implement this Redis Cache into your web application.
How to setup and access the Azure Redis cache by using Visual Studio with C#?
You can download my source code in GitHub: https://github.com/Arthurwiz/DemoRedisCache
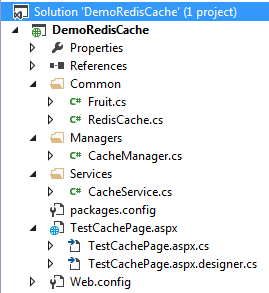
I'll be using Visual Studio program with C# to do the demo project. I create a new project with ASP.NET Web Application template with .NET Framework 4.5, which I named it, DemoRedisCache. In the project, I created 3 folders: Common, Managers, Services for a general multi-tier architecture.
I'll be using Visual Studio program with C# to do the demo project. I create a new project with ASP.NET Web Application template with .NET Framework 4.5, which I named it, DemoRedisCache. In the project, I created 3 folders: Common, Managers, Services for a general multi-tier architecture.
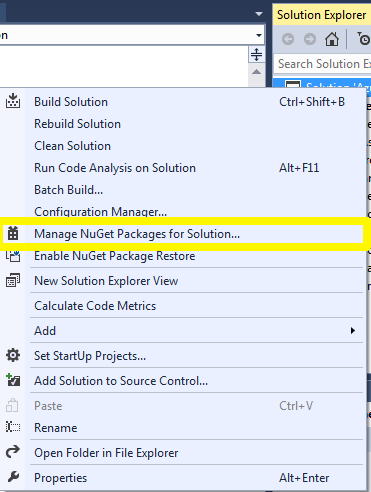
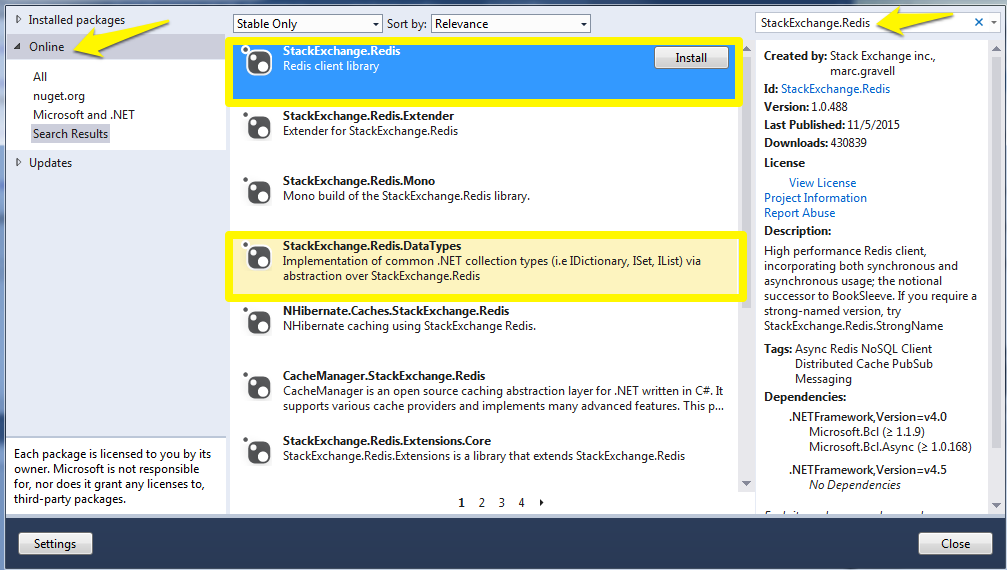
In this empty project, I highlight the project name from the Solution Explorer, and select "Manage NuGet Packages for Solution". When the NuGet windows comes out, select the "Online" source from the left, and then type "StackExchange.Redis" in the top right search box. In this example, I'll create a generic list called List<Fruit> as my data type to demonstrate the process of saving and retrieving the data from the Azure Redis Cache service. Please note that the StackExchange.Redis client requires .NET Framework 4 or higher. In our example, we use 4.5.
In the Web.config file, I have these keys.
<appSettings>
<add key="CacheEndpoint" value="yourDNSname.redis.cache.windows.net" />
<add key="CachePassword" value="yourRedisCachePassword_here" />
<add key="CacheSyncTimeout" value="3000" />
<add key="CacheConnectTimeout" value="4000" />
</appSettings>
-- Fruit.cs
public class Fruit
{
public int FruitID { get; set; }
public string FruitName { get; set; }
public string Color { get; set; }
}
-- RedisCache.cs
In the Services folder, I have one file.
-- CacheService.cs
In the Managers folder, I have one file.
-- CacheManager.cs
In the root, I have a start up webpage that I use it to demo the cache.
-- TestCache.Page.aspx
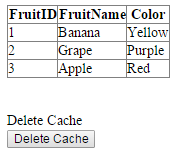
It will look like this when app runs.
<appSettings>
<add key="CacheEndpoint" value="yourDNSname.redis.cache.windows.net" />
<add key="CachePassword" value="yourRedisCachePassword_here" />
<add key="CacheSyncTimeout" value="3000" />
<add key="CacheConnectTimeout" value="4000" />
</appSettings>
-- Fruit.cs
public class Fruit
{
public int FruitID { get; set; }
public string FruitName { get; set; }
public string Color { get; set; }
}
-- RedisCache.cs
In the Services folder, I have one file.
-- CacheService.cs
In the Managers folder, I have one file.
-- CacheManager.cs
In the root, I have a start up webpage that I use it to demo the cache.
-- TestCache.Page.aspx
It will look like this when app runs.
How do you know when do you need to upgrade your Redis Cache plan?
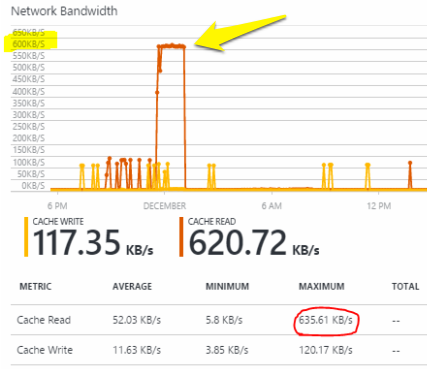
There are many reasons that you might need to consider to upgrade your plan, such as the limit on the number of connections you can make to your cache, the cache size and the speed of calling the cache, and finally the bandwidth. By looking at the Network Bandwidth chart provided by the Azure portal, you can see the flat top when you reach the maximum cache read call KB/s limit. The example shown below is using the Basic C0 plan:
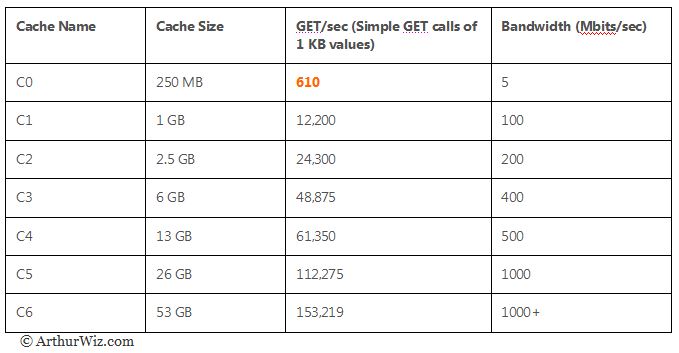
There are different limits to the plans. Please see the table below:
I hope this article is helpful for you.

 RSS Feed